Greenhouse / Reimbi integration setup
The Reimbi-Greenhouse integration allows candidate data to be sent from Greenhouse to Reimbi resulting in the candidate record being created in Reimbi. Upon receiving the required information via the integration Reimbi will send the candidate an email with Reimbi login instructions so that their expense report can be submitted and reimbursed.
To configure the Reimbi-Greenhouse integration follow the steps below.
Configure User Setup Permissions in Greenhouse Recruiting
In order to enable the Greenhouse/Reimbi integration, you will need the developer permission Can manage ALL organization’s API Credentials.
If you do not have this permission, contact your company’s Greenhouse admin user with Site Admin level permissions and the additional user-specific permission Can edit another user's advanced permissions to apply the API credential management permission to your account. Have the user with Site Admin level permissions edit your user account's permissions by navigating to the Configure icon  > Users > Your Name

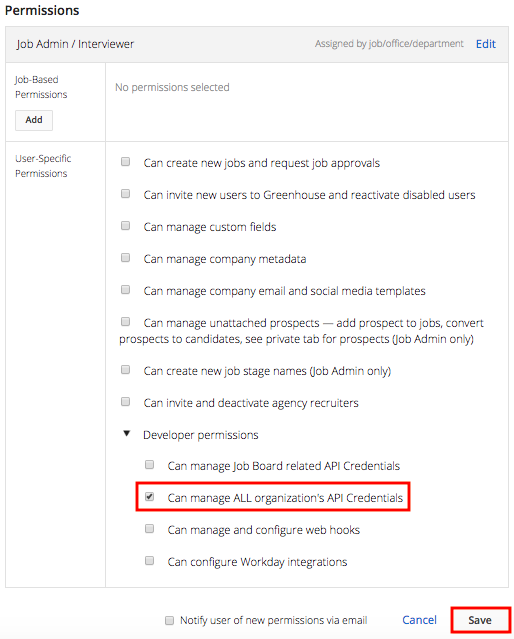
The user with Site Admin level permissions should navigate to the Permissions panel on your user page and expand the Developer Permissions dropdown menu.
Select Can manage ALL organization’s API Credentials so that a check is in the checkbox. When finished, click Save.
Step 1: Create a Harvest API Key for the Greenhouse/Reimbi Integration
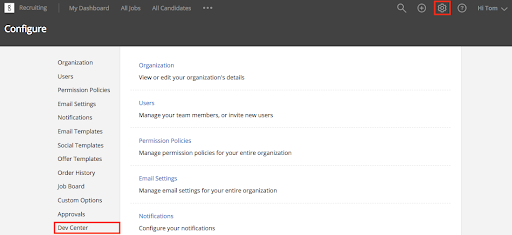
To create a Harvest API key for the integration, click on the Configure icon in the upper right-hand corner. Navigate to Dev Center on the left-hand panel.
From the Dev Center page, click API Credential Management.

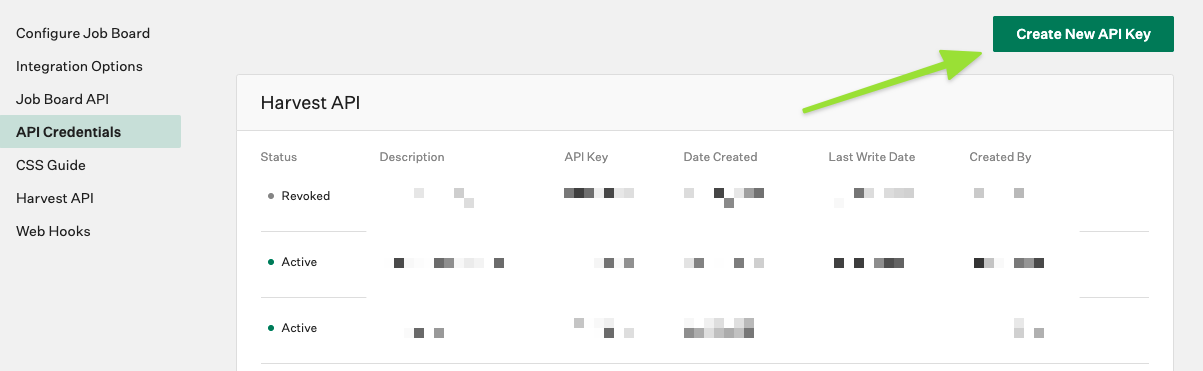
From the API Credential Management page, click Create New API Key to generate the API key for Reimbi.
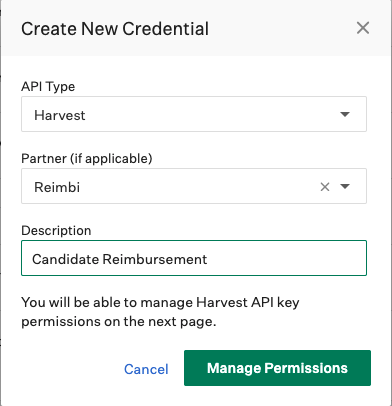
From the Create new credential dialog box, give your API key a name and select Harvest from the Type dropdown menu. When finished, click Create.
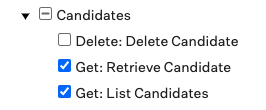
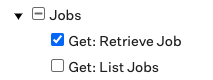
On the Manage API Key Permissions page, select Candidates and Jobs. When finished, click Update.
Your Harvest API key for the Greenhouse/Reimbi integration is created and configured.
Step 2: Add Greenhouse Harvest API key to Reimbi and complete approver settings
This step must be done by a Reimbi user with the Admin role.
- Go to Reimbi, navigate to Company Settings > Integrations
- Turn the “Greenhouse integration slider to “On”
- Enter your Harvest API Key
- Choose the role that will be the approver of the expense report in Reimbi. This can either be the coordinator or recruiter listed on the candidate’s record in Greenhouse
- Choose who will be the backup approver. If for some reason Reimbi can't assign the approver based on the information we receive from Greenhouse (coordinator doesn't exist in Reimbi for example) then the listed person will be assigned as the approver.
- Click “Update”.
Step 3: Retrieve Reimbi’s Endpoint URL and Secret Key
Greenhouse will need two pieces of information:
- Reimbi’s Endpoint URL
- Reimbi’s Secret Key
To retrieve this information please:
- Log into Reimbi as a company admin
- Navigate to Company Settings > Integrations
- Click the Generate Web Hook Secret Key and API URL link
- Copy your Endpoint URL and Secret Key
Step 4: Store Reimbi Endpoint URL and Secret Key in Greenhouse
With Reimbi’s endpoint URL and Secret Key copied and your Greenhouse user permissions enabled, you are ready to enable the Greenhouse/Reimbi integration.
To enable the integration, click the Configure icon in the upper right-hand corner and navigate to Dev Center on the left-hand panel.
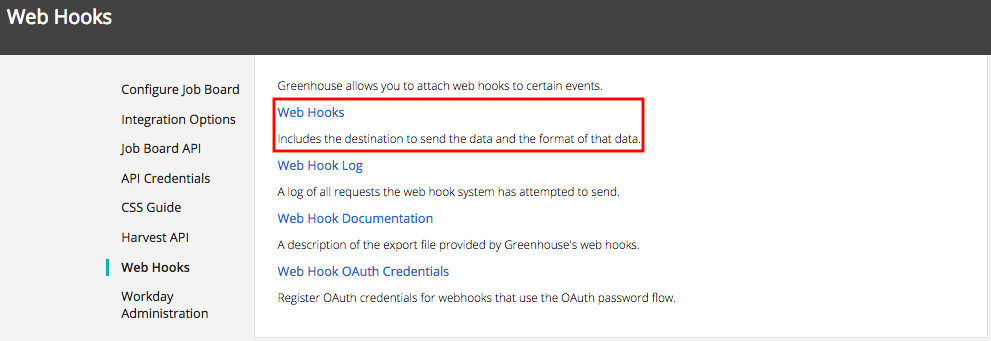
From the Dev Center page, click Web Hooks. Click Web Hooks from the subsequent page.
You will be directed to a new page where you Create a New Web Hook. From this page provide the following details:
- Name: we suggest Reimbi Integration
- When: Candidate or Prospect updated
- Endpoint URL: The Endpoint URL received in previous steps
- Secret Key: The Secret Key received in previous steps
- Disabled?: No
When finished, click Create Web hook.
Step 5: Add reimbursement policy field and policy names to Greenhouse
This step is only required if you have more than one reimbursement policy setup in Reimbi.
- Visit https://app.greenhouse.io/custom_fields/candidates
- Click + Add Field button
- Name this field Reimbi Reimbursement Policy
- Choose Single Select type
- Add the names of your policies, one per line, in the Options box.
- The names of the policies must match the policy names as listed in Reimbi. The can be reviewed by clicking the Policies link the side menu in Reimbi.
- Click Save and close the tab
Step 6: Create custom 'Send to Reimbi' candidate field in Greenhouse
- Visit https://app.greenhouse.io/custom_fields/candidates
- Click + Add Field button
- Name this field Send to Reimbi
- Choose Yes/No type
- Click Save and close the tab
That's it! Your Greenhouse account and Reimbi account can now talk to each other.
How to use the Reimbi Integration with Greenhouse
- Log into Greenhouse and go to any candidate’s Details tab
- Select the reimbursement policy to assign to the candidate. Click Save.
- Toggle the Send to Reimbi field to Yes. Click Save.
- Two events will happen:
a. the candidate record will appear in Reimbi with the status ‘Invitation Pending’ and assigned to the policy selected in Greenhouse. b. the candidate will receive an email with information on how to set up their Reimbi account and submit their expenses for reimbursement.
Need Help?
Please contact support@reimbi.com for troubleshooting assistance regarding the integration.