Single Sign On (SSO)
Custom SAML Provider Integration
Single Sign-On (SSO) functionality for enterprise customers is available to access Reimbi through a single authentication source using any SAML-compliant Identity Provider. This allows IT administrators to better manage team access and keeps information more secure. SSO is only used for staff account users. It has no impact on your requesters/candidates.
Reimbi uses SAML (Security Assertion Markup Language), a standard that permits identity managers to safely pass authorization credentials to service providers like Reimbi.
Identity Provider Configuration
Creating New Application
- Sign in to your Identity Provider's administration portal
- Navigate to the section for creating new applications or service provider integrations
- Create a new SAML application
- Name the application "Reimbi"
Configuring Application Properties
- Upload the Reimbi logo from https://www.reimbi.com/branding
- Configure the application visibility and access settings according to your organization's requirements
SAML Configuration
- Configure the SAML settings in your Identity Provider:
- Enter the Identifier (Entity ID)
- Enter the Reply URL (Assertion Consumer Service URL)
These values can be found at https://app.reimbi.com/users/~saml-sso/
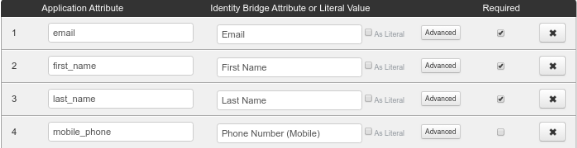
Required Attribute Mapping
Configure the following attribute mappings in your Identity Provider:
Reimbi Configuration
Setting Up SSO Integration
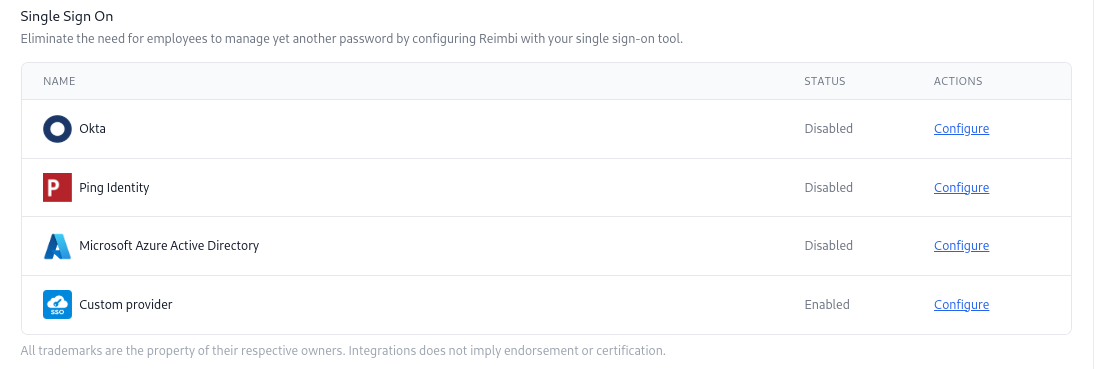
- Navigate to Company Settings, open the Integrations page
- Click the "Configure" link next to Custom provider (https://app.reimbi.com/users/~saml-sso/)
- Select Custom Provider as the Single Authentication Source
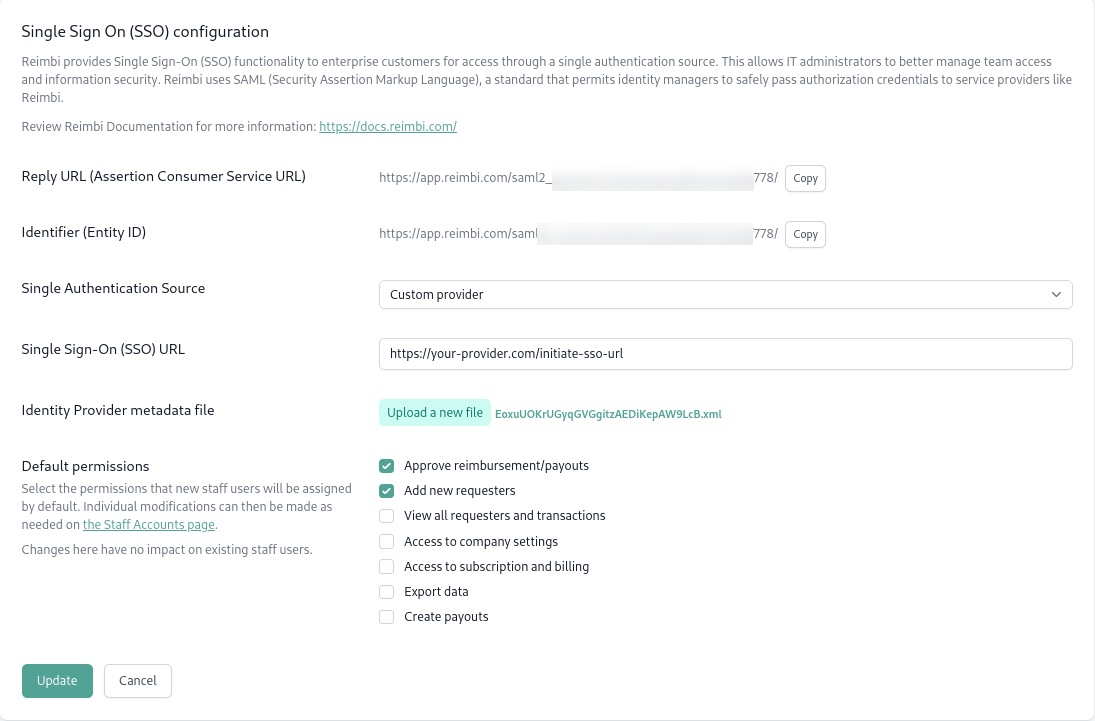
Configuring SSO Details
- Upload the Identity Provider metadata file (typically an XML file provided by your Identity Provider)
- Enter the Single Sign-On (SSO) URL provided by your Identity Provider - this is the URL that users will be redirected to when initiating the SSO login process (sometimes called Login URL or IdP SSO URL)
Using SSO Login
Initial Login Process
New users must initiate their first Reimbi login through your Identity Provider:
- Access Reimbi through your organization's application portal
- Complete the authentication process through your Identity Provider
- You will be automatically redirected to Reimbi
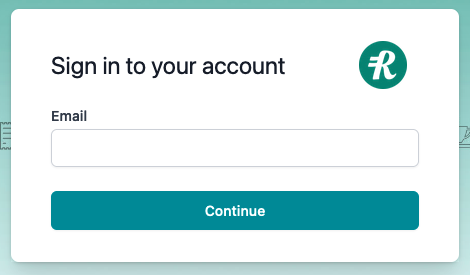
Direct Login Process
For subsequent logins, users can:
- Go directly to the Reimbi login page: https://app.reimbi.com/account/login/
- Enter their email address
- Be automatically redirected to your Identity Provider for authentication
Note: Staff users will appear on the Staff accounts page in Reimbi after their initial login. After the initial login, staff users can continue to login via your Identity Provider or login directly to Reimbi.
Permission Management
Default Permissions
Configure default permissions for new staff users in the Company Settings:
- Navigate to Company Settings -> Staff accounts
- Select the default permissions for new users
- Save your changes
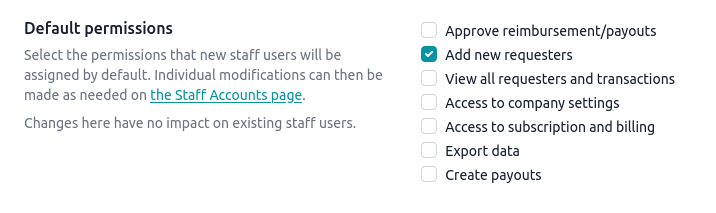
Important: Changes to default permissions only affect new users and have no impact on existing staff accounts. Individual permission modifications can be made as needed through Company Settings -> Staff accounts.