
Single Sign On (SSO)
Microsoft Entra Integration
This guide walks through configuring Microsoft Entra (formerly Microsoft Azure Active Directory) as your Reimbi Single Sign-On (SSO) provider. For general background on how SSO works in Reimbi, see the SSO overview.
Microsoft Entra Configuration
Creating New Application
- Sign in to the Microsoft Entra portal: https://entra.microsoft.com/
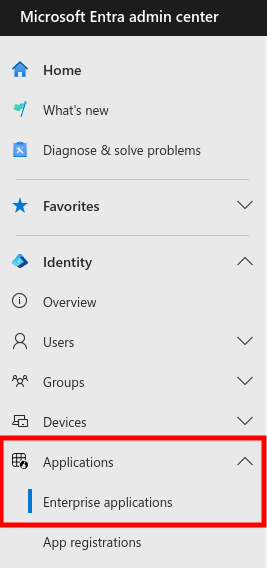
- Navigate to the Applications
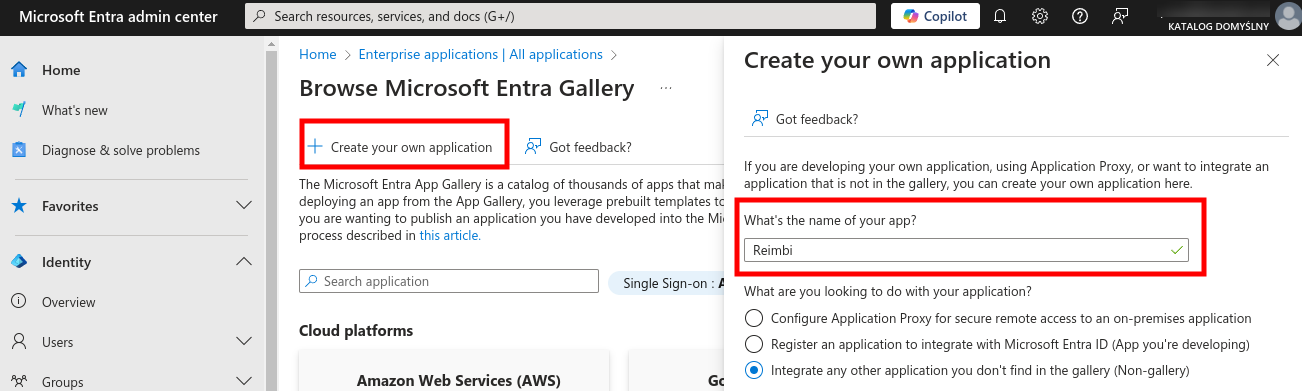
- Click Enterprise applications, then New application
- Click Create your own application and enter "Reimbi" as the name
Configuring Application Properties
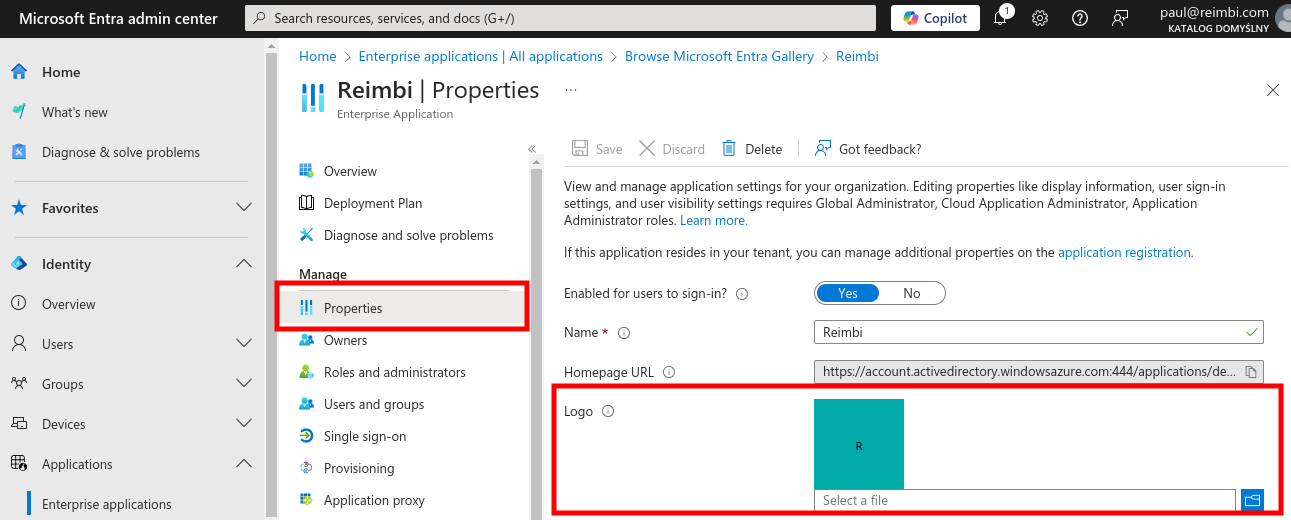
Navigate to the Properties tab and upload the Reimbi logo from https://www.reimbi.com/branding
SAML Configuration
- Navigate to the Single Sign-On tab and select "SAML"
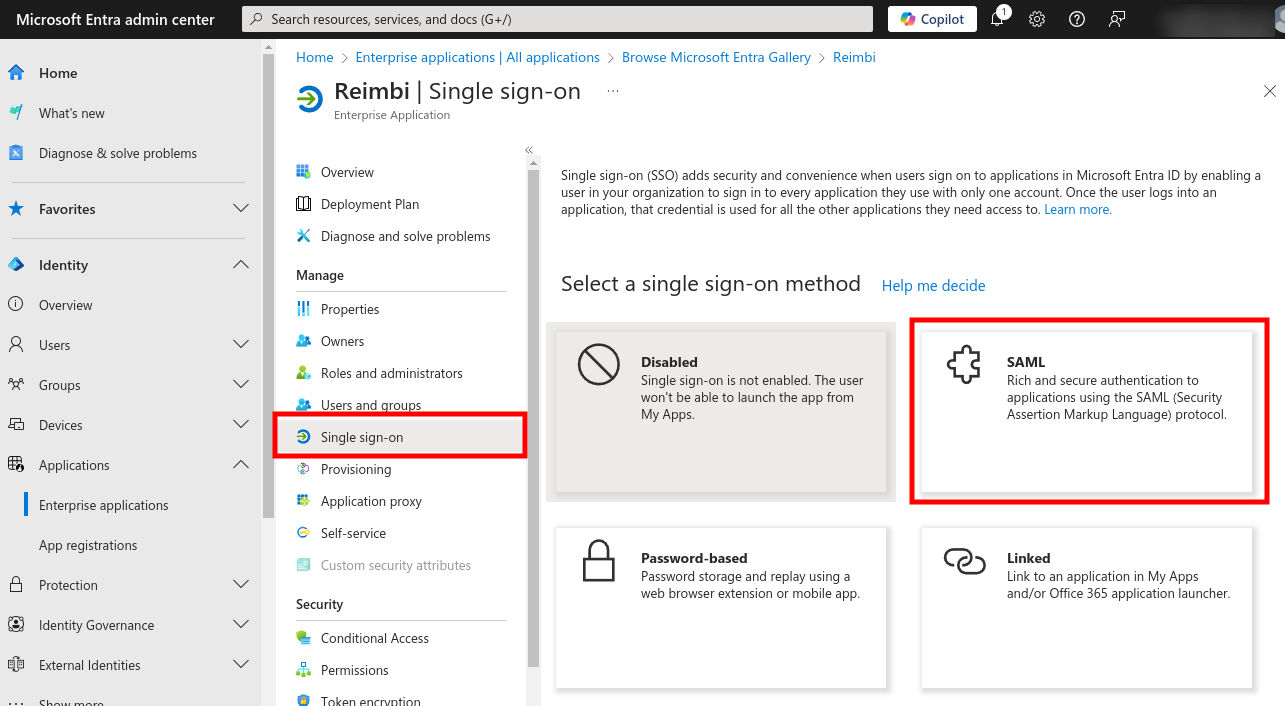
- Click the Edit button
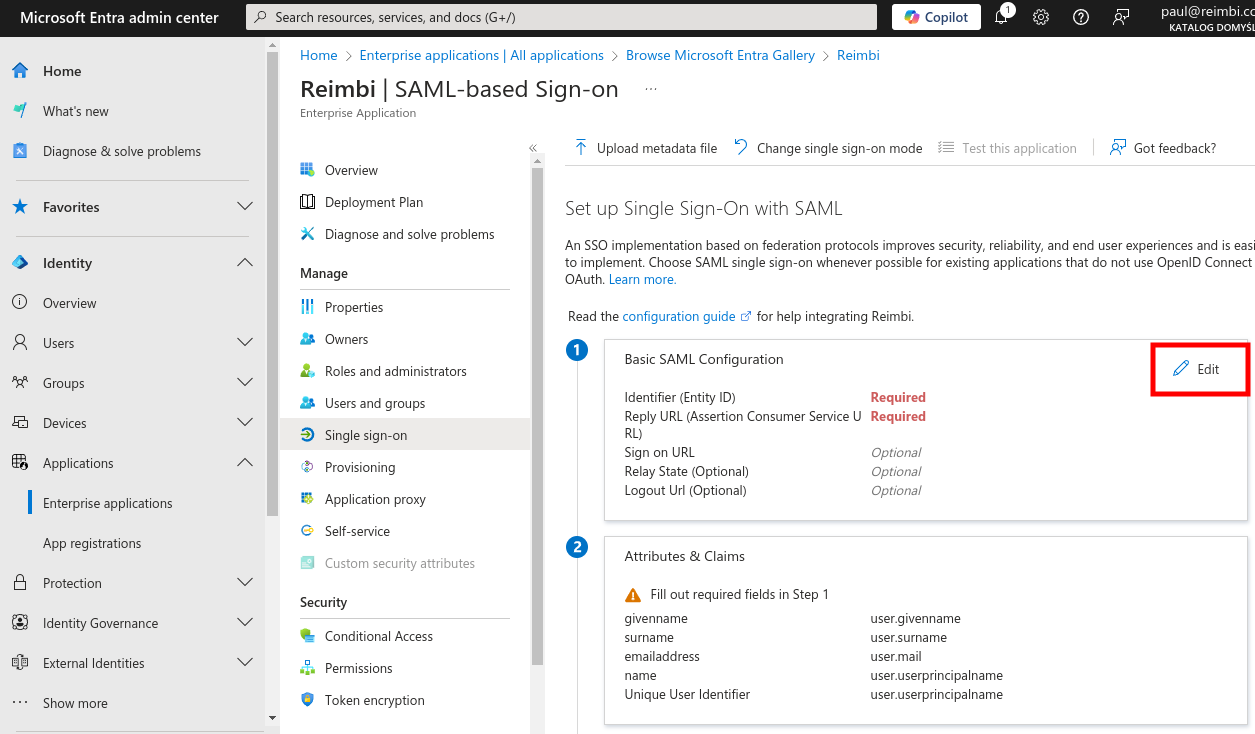
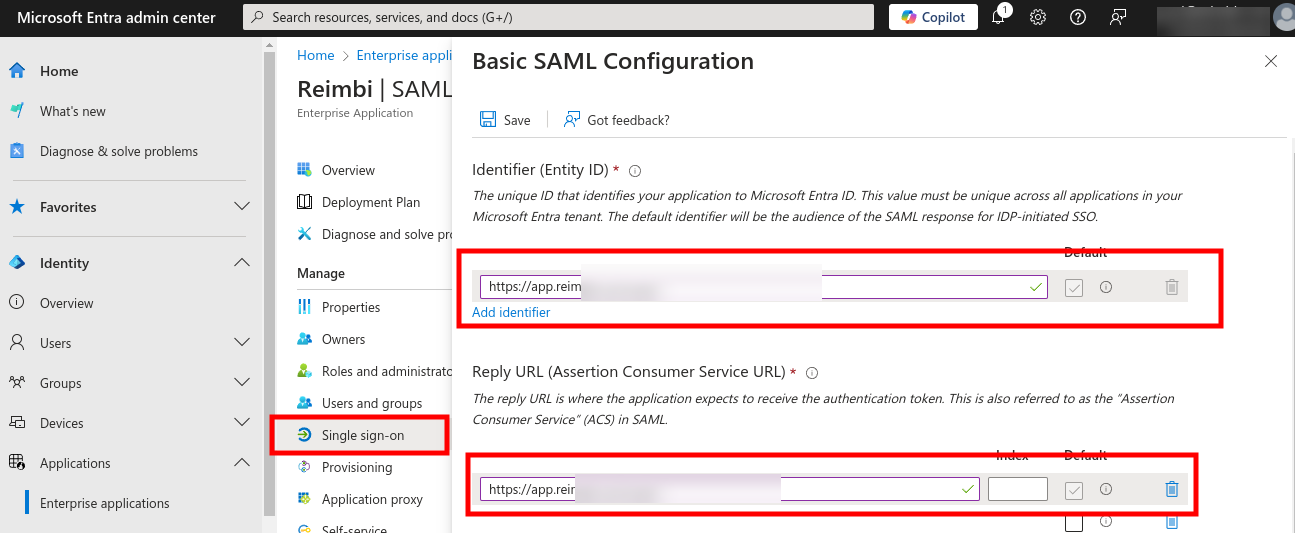
- Configure the SAML settings:
- Enter the Identifier (Entity ID)
- Enter the Reply URL (Assertion Consumer Service URL)
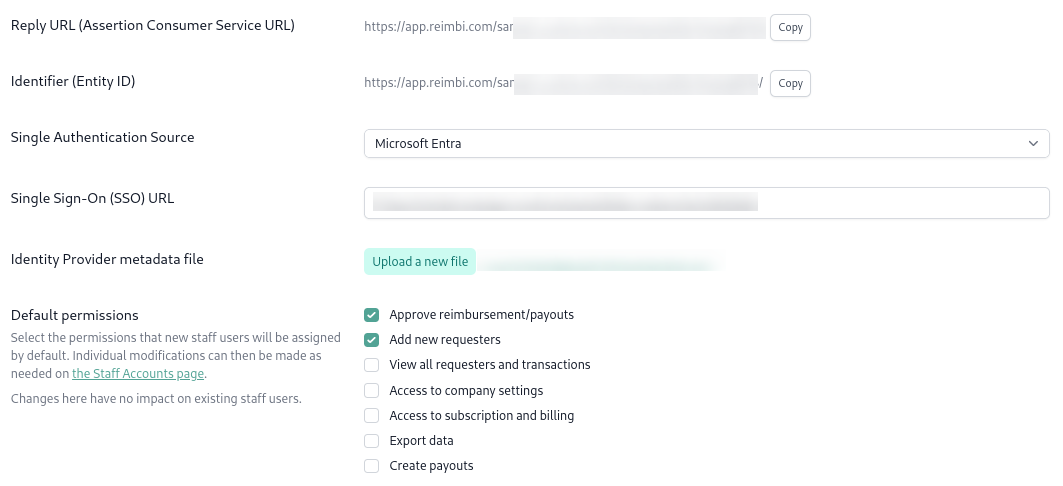
These values can be found at https://app.reimbi.com/users/~saml-sso/
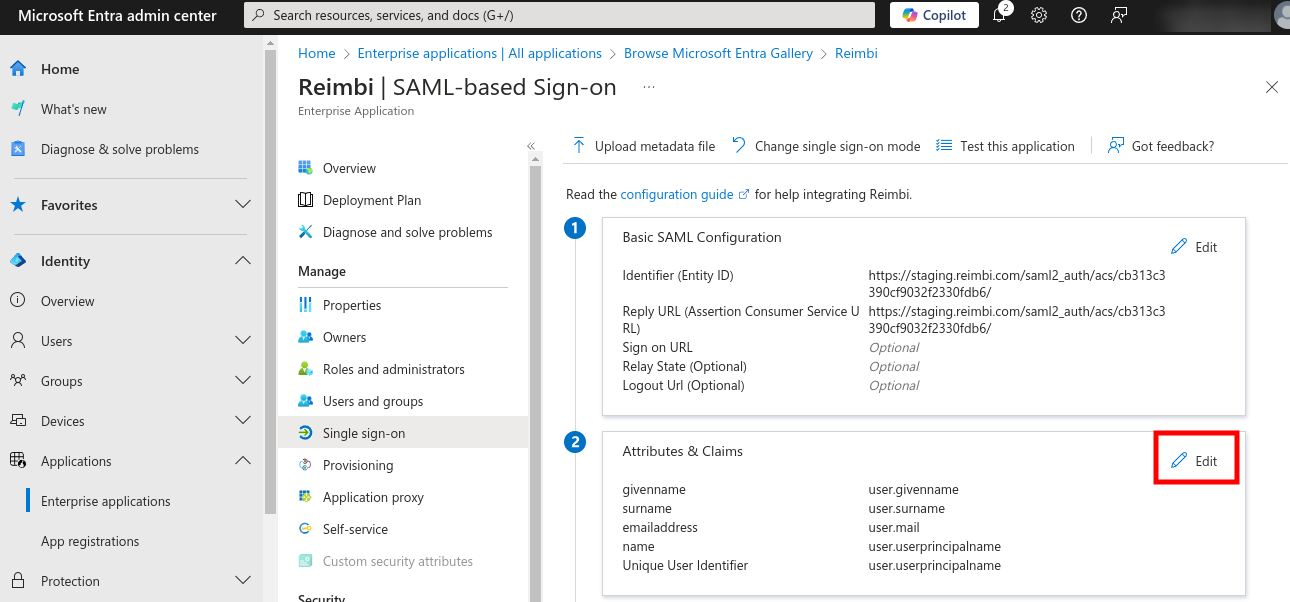
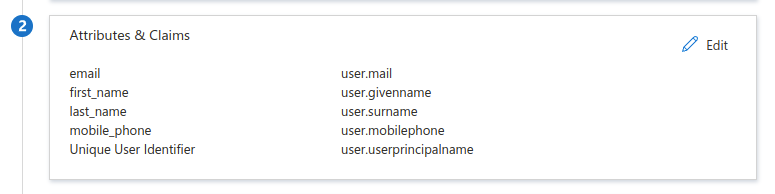
Attribute Mapping
Configure the attribute mappings in Microsoft Entra:
Reimbi Configuration
Setting Up SSO Integration
- Navigate to Company Settings -> Integrations tab
- Click the "Configure" link (https://app.reimbi.com/users/~saml-sso/)
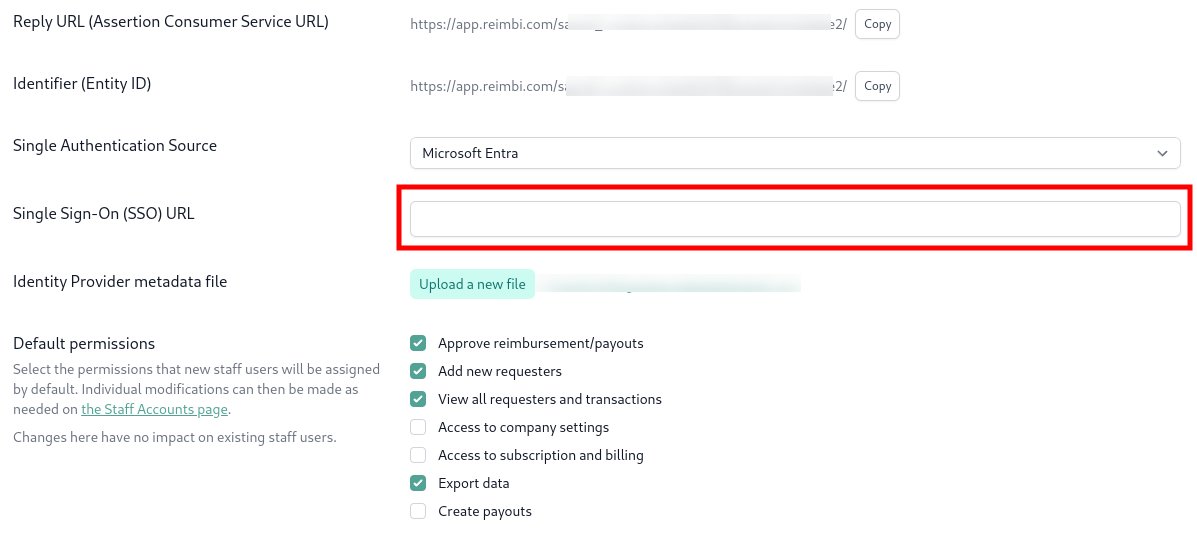
- Select Microsoft Entra as the Single Authentication Source
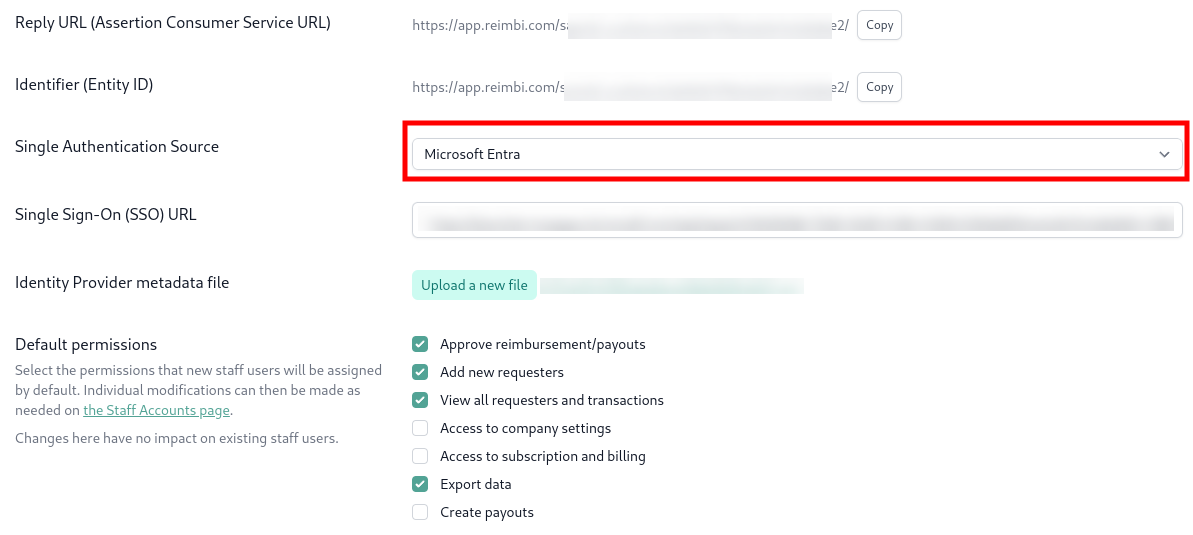
Configuring SSO Details
- Upload the Identity Provider metadata file
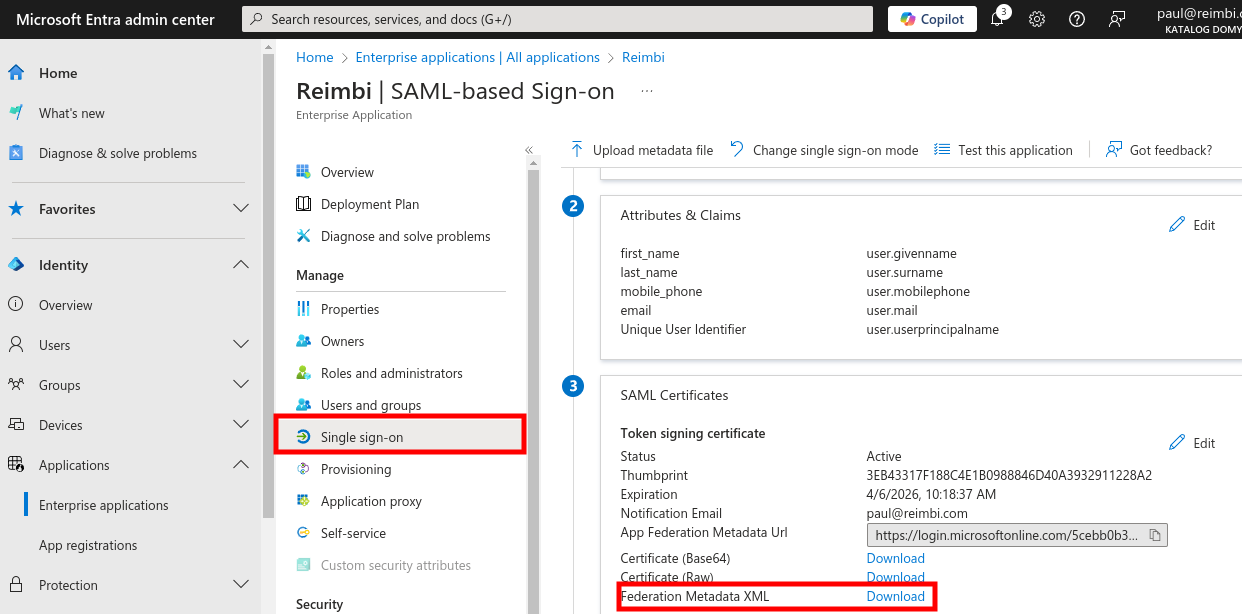
- Locate the Single Sign-On (SSO) URL
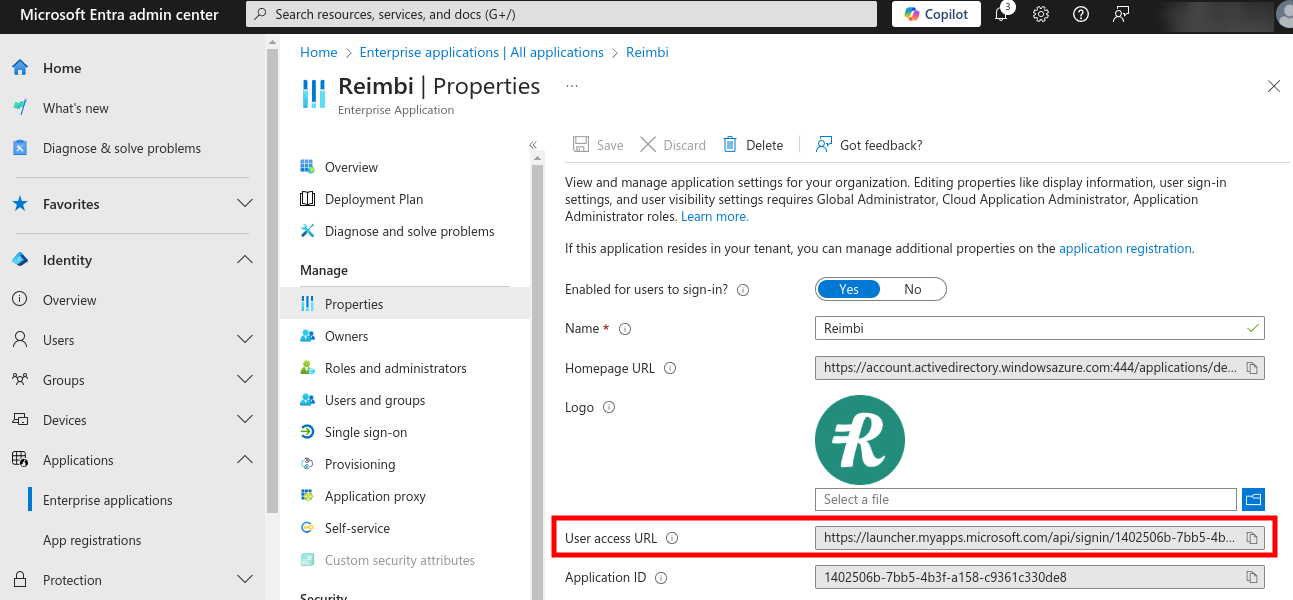
- Enter the Single Sign-On (SSO) URL in Reimbi
Permission Management
Default Permissions
Configure default permissions for new staff users in the Company Settings:
- Navigate to Company Settings -> Staff accounts
- Select the default permissions for new users
- Save your changes
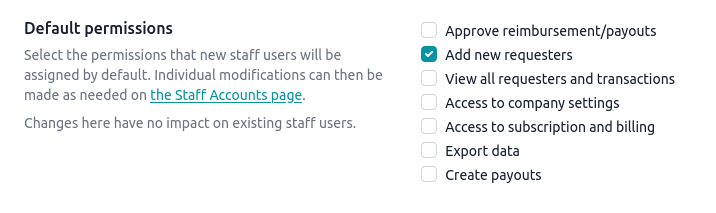
Important: Changes to default permissions only affect new users and have no impact on existing staff accounts. Individual permission modifications can be made as needed through Company Settings -> Staff accounts.