
Single Sign On (SSO)
Ping Identity Integration
This guide walks through configuring Ping Identity as your Reimbi Single Sign-On (SSO) provider. For general background on how SSO works in Reimbi, see the SSO overview.
Ping Identity Configuration
Creating New SAML Application
- Login to the admin panel at https://admin.pingone.com/web-portal/login
- Navigate to the Applications tab
- Click the Add Application button and select New SAML Application
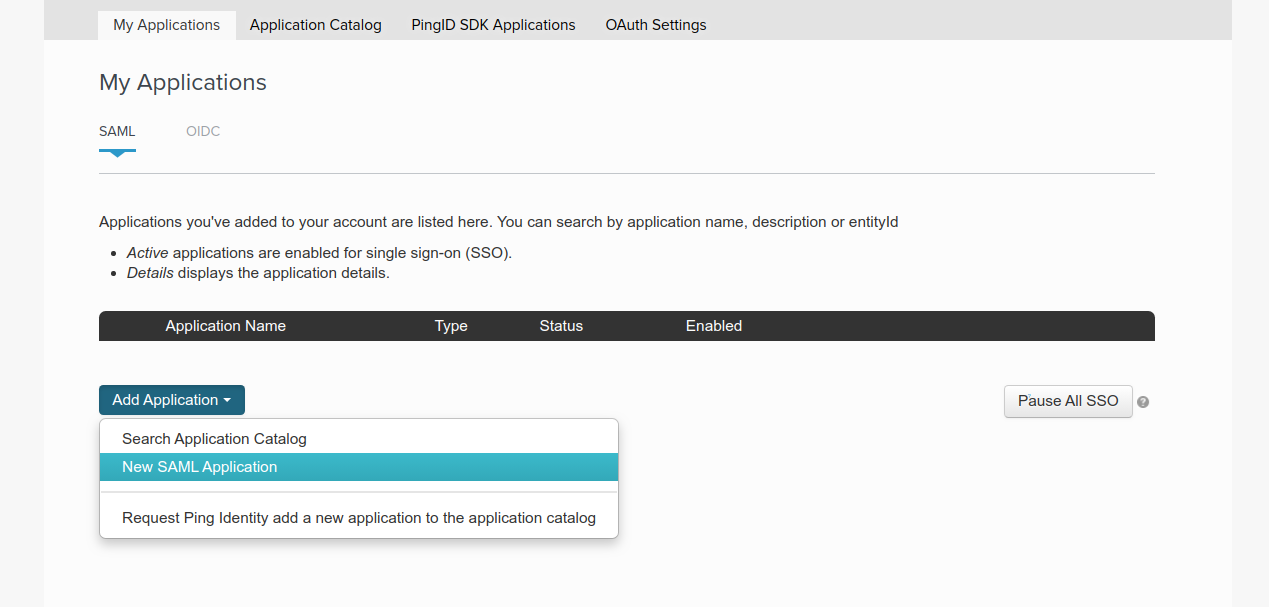
Application Details
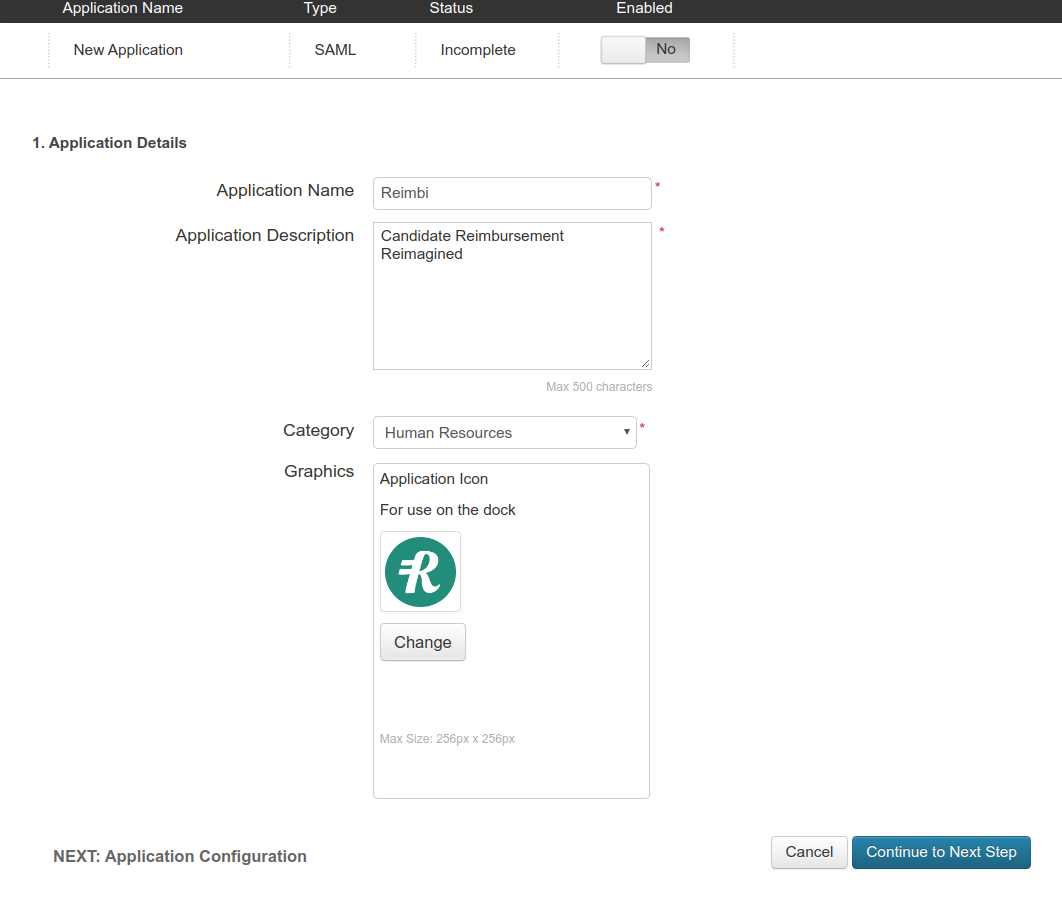
Configure the basic application settings:
- App name: Reimbi
- Sample description: Reimbursement Reimagined
- Logo: https://www.reimbi.com/branding
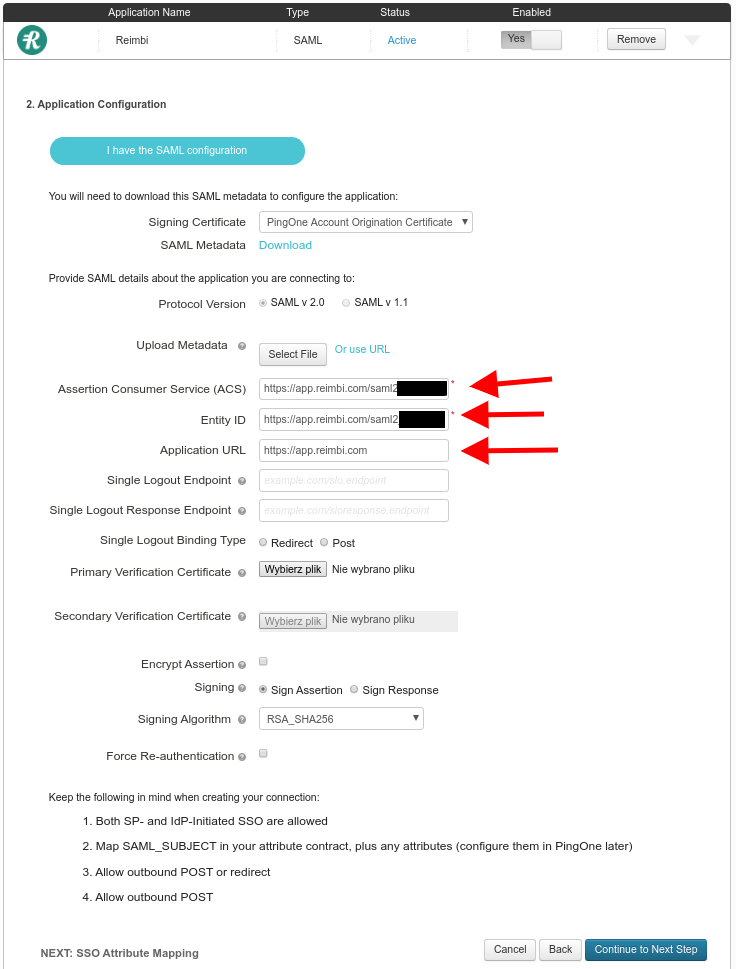
SAML Configuration
Configure the SAML settings using values from Reimbi:
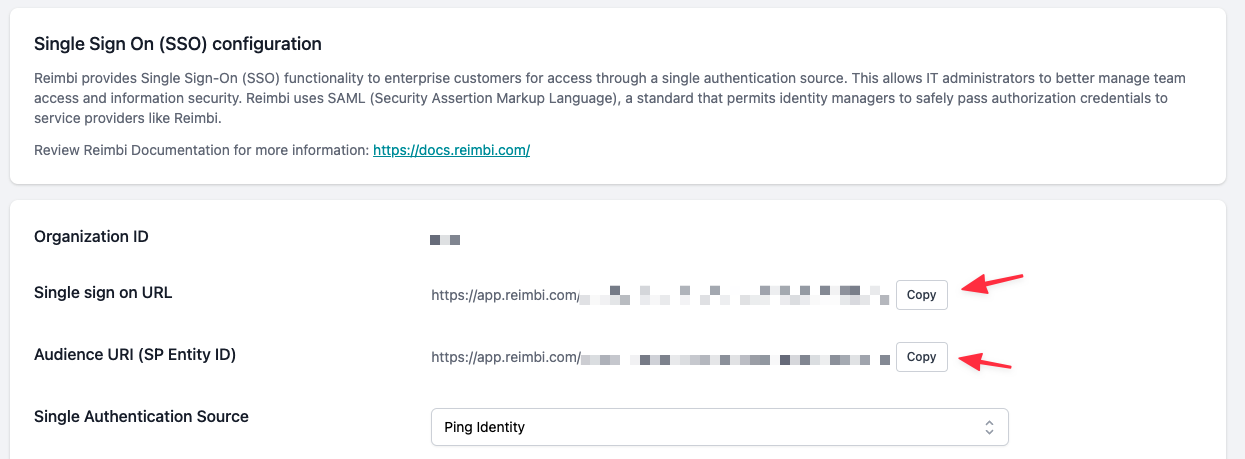
- Single sign on URL: Found in Reimbi Company Settings -> SSO tab
- Audience URI: Found in Reimbi Company Settings -> SSO tab
Attribute Mapping
Configure the SSO attribute mapping settings:
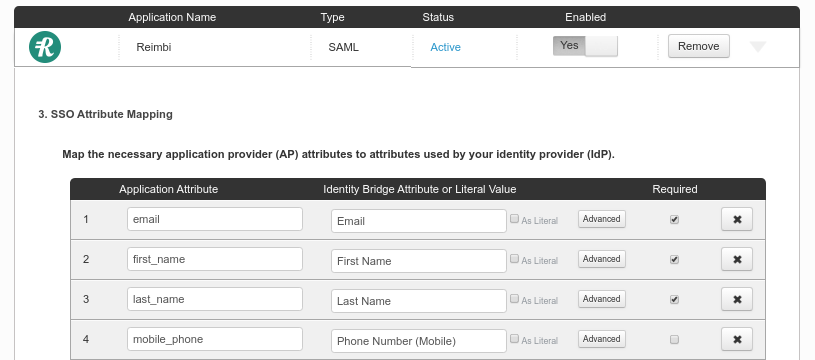
Complete the setup by clicking Continue to Next Step and then the Finish button.
Reimbi Configuration
Setting Up SSO Integration
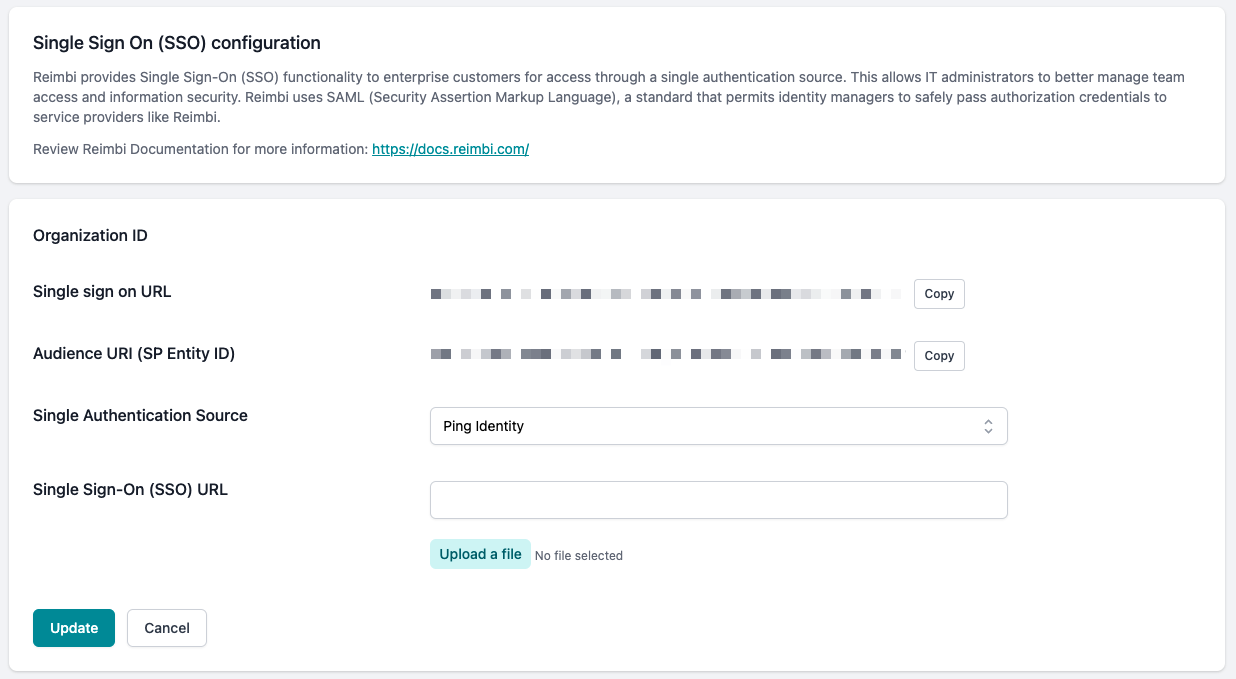
- Navigate to Company Settings and select the SAML SSO tab
- Select Ping Identity as Single Authentication Source
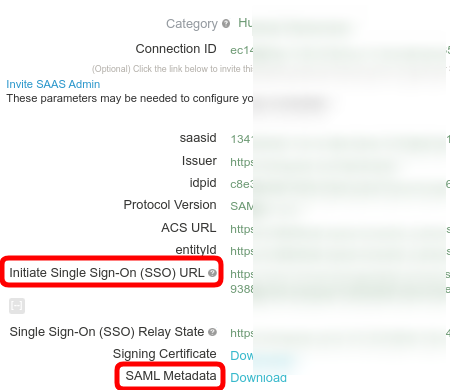
- Upload the Identity Provider metadata file
- Enter the Initiate Single Sign-On (SSO) URL from Ping Identity
Permission Management
Default Permissions
Configure default permissions for new staff users in the Company Settings:
- Navigate to Company Settings -> SSO tab
- Select the default permissions for new users
- Save your changes
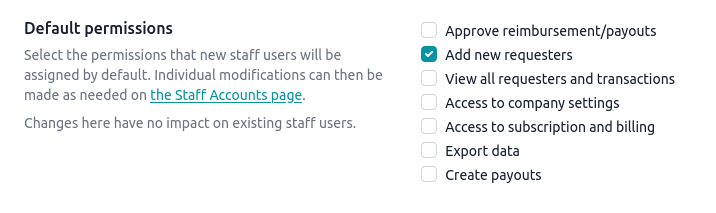
Important: Changes to default permissions only affect new users and have no impact on existing staff accounts. Individual permission modifications can be made as needed through Company Settings -> Staff accounts.